
Web Server

In this example, you will use your Ethernet Shield and your Arduino board to create a simple Web server. Using the Ethernet library, your device will be able to answer a HTTP request with your Ethernet shield. After opening a browser and navigating to your Ethernet shield's IP address, your Arduino will respond with just enough HTML for a browser to display the input values from all six analog pins.


Step 1: What You Need?

1 x Arduino Board ( Arduino UNO used in this tutorial) 
1 x Arduino Ethernet Shield


Don't have components? Don't worry. Just click the component's name. 


Step 2: Build Your Circuit.

The Ethernet shield allows you to connect a WizNet Ethernet controller to the Arduino boards via the SPI bus. It uses pins 10, 11, 12, and 13 for the SPI connection to the WizNet. Later models of the Ethernet shield also have an SD Card on board. Digital pin 4 is used to control the slave select pin on the SD card.

The shield should be connected to a network with an Ethernet cable. You will need to change the network settings in the program to correspond to your network.
In the above image, the Arduino or Genuino board would be stacked below the Ethernet shield.


Step 3: Upload The Code.

1. Select the Arduino board type: Select Tools >> Board >> Select your correct Arduino board used.


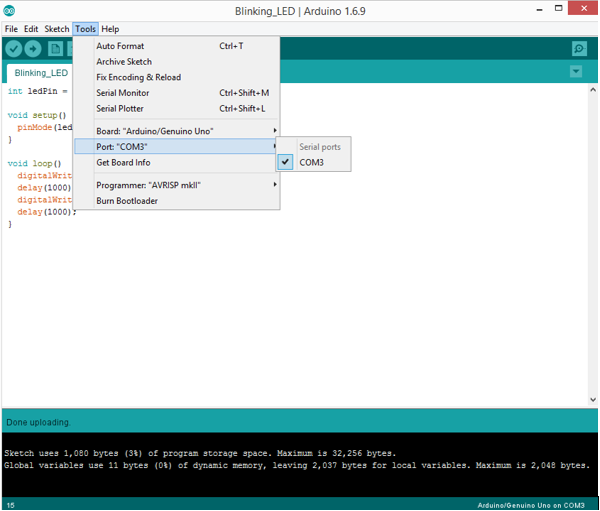
2. Find the port number by accessing device manager on Windows. See the section Port (COM&LPT) and look for an open port named "Arduino Uno (COMxx)". If you are using a different board, you will find a name accordingly. What matters is the xx in COMxx part. In my case, it's COM3. So my port number is 3.


Select the right port: Tools >> Port >> Select the port number.


3. You can find this code in the example of Arduino IDE.
Select File >> Examples >> Ethernet >> WebServer

Click press the "upload" button (see the button with right arrow mark).
/*
Web Server A simple web server that shows the value of the analog input pins.
using an Arduino Wiznet Ethernet shield. Circuit:
* Ethernet shield attached to pins 10, 11, 12, 13
* Analog inputs attached to pins A0 through A5 (optional) created 18 Dec 2009
by David A. Mellis
modified 9 Apr 2012
by Tom Igoe
modified 02 Sept 2015
by Arturo Guadalupi */ #include <SPI.h>
#include <Ethernet.h> // Enter a MAC address and IP address for your controller below.
// The IP address will be dependent on your local network:
byte mac[] = {
0xDE, 0xAD, 0xBE, 0xEF, 0xFE, 0xED
};
IPAddress ip(192, 168, 1, 177); // Initialize the Ethernet server library
// with the IP address and port you want to use
// (port 80 is default for HTTP):
EthernetServer server(80); void setup() {
// Open serial communications and wait for port to open:
Serial.begin(9600);
while (!Serial) {
; // wait for serial port to connect. Needed for native USB port only
} // start the Ethernet connection and the server:
Ethernet.begin(mac, ip);
server.begin();
Serial.print("server is at ");
Serial.println(Ethernet.localIP());
} void loop() {
// listen for incoming clients
EthernetClient client = server.available();
if (client) {
Serial.println("new client");
// an http request ends with a blank line
boolean currentLineIsBlank = true;
while (client.connected()) {
if (client.available()) {
char c = client.read();
Serial.write(c);
// if you've gotten to the end of the line (received a newline
// character) and the line is blank, the http request has ended,
// so you can send a reply
if (c == '\n' && currentLineIsBlank) {
// send a standard http response header
client.println("HTTP/1.1 200 OK");
client.println("Content-Type: text/html");
client.println("Connection: close"); // the connection will be closed after completion of the response
client.println("Refresh: 5"); // refresh the page automatically every 5 sec
client.println();
client.println("<!DOCTYPE HTML>");
client.println("<html>");
// output the value of each analog input pin
for (int analogChannel = 0; analogChannel < 6; analogChannel++) {
int sensorReading = analogRead(analogChannel);
client.print("analog input ");
client.print(analogChannel);
client.print(" is ");
client.print(sensorReading);
client.println("<br />");
}
client.println("</html>");
break;
}
if (c == '\n') {
// you're starting a new line
currentLineIsBlank = true;
} else if (c != '\r') {
// you've gotten a character on the current line
currentLineIsBlank = false;
}
}
}
// give the web browser time to receive the data
delay(1);
// close the connection:
client.stop();
Serial.println("client disconnected");
}
}


Warning


This example doesn't require an SD card. If an SD card is inserted but not used, it is possbile for the sketch to hang, because pin 4 is used as SS (active low) of the SD and when not used it is configured as INPUT by default. 

Two possible solutions:
  • remove the SD card;
  • add these lines of code in the setup()

pinMode(4, OUTPUT);
digitalWrite(4, HIGH);

http://news.chivindo.com/687/web-server.html

Comments

Popular posts from this blog

BT-BASIC commands used

8.10     Some of the most frequently used BT-BASIC commands used are: msi                               Changes default working directory. Mass storage is            Same as “msi” cat                               Catalogs (list)the node names in the specified directory.             get                               Brings the contents of a file into the system workspace.             load                             Same as “get”.             msi$                            Returns the directory pathname of the current working directory.             msi “..”                       Backs up one directory level.             findn                            Locates the next occurrence of the a given sting in the workspace. 8.11           If you wish to invoke the HP Board Graphics Viewer, type board graphics at the BT-BASIC command line and press the “ENTER” key on the keyboard. 8.12           A HP Board Graphics Viewer window should now appear

Perhitungan & Cara Merubah Kumparan Blender Dari 220 V Menjadi 12 V

          Seperti yang telah dijelaskan pada buku “menggulung motor listrik arus bolak-balik, servis peralatan listrik rumah tangga kelompok penggerak dan perbaikan peralatan listrik pertukangan”, bahwa motor penggerak yang digunakan pada perlatan listrik rumah tangga dan pertukangan seperti blender, mixer, bor tembak, gerinda dsb menggunakan jenis motor universal. Motor universal adalah jenis motor listrik yang dapat disuplai dengan sumber listrik arus bolak-balik (AC) dan arus searah (DC). Jadi peralatan-peralatan listrik rumah tangga dan pertukangan tersebut yang biasanya kita suplai dengan sumber listrik AC dari PLN atau Genset sebesar 220 V sebenarnya dapat juga kita suplai dengan sumber listrik DC yang tentunya tegangan juga harus sama yakni 220 V.           Yang menjadi permasalahan bagaimana kalau peralatan listrik rumah tangga atau pertukangan tersebut, sebagai contoh misalkan blender yang ingin digunakan atau dioperasikan pada tempat yang tidak terdapat sumber listrik PLN ata

BT-BASIC command line

8.8       At the BT-BASIC command line type the command  msi  and the directory path, then press the “ENTER” key on the keyboard.  Example:                   msi ‘/hp3070/boards/aspect/main’ 8.9       At the BT-BASIC command line type the command  get ‘testplan’ and press the   ENTER” key on the keyboard.  You should now see the body of the testplan file displayed in the work space of the BT-BASIC window. 8.10     Some of the most frequently used BT-BASIC commands used are:

Autodesk SketchBook Pro 2021 Full Version

BAGAS31 – Sesuai dengan namanya, Autodesk SketchBook Pro 2021 Full Version ini merupakan software digital sketching atau drawing terbaik yang bisa kamu gunakan. Pada versi terbaru kali ini, ada beberapa penambahan fitur yang sangat efektif. Dengan fitur baru tersebut, diharapkan mampu meningkatkan proses sketching maupun drawing kamu. Autodesk SketchBook sendiri sudah bisa kamu dapatkan secara gratis melalui website resminya. Namun untuk kamu yang mau download versi Autodesk Sketchbook Pro, maka bisa langsung download melalui link yang sudah saya sediakan di bawah ini. Download Autodesk SketchBook Pro 2021 Full Version Screenshot: System Requirements: Windows 10 2.5 – 2.9 GHz of Intel or AMD CPU 4 GB of Memory 256 MB Graphics card with OpenGL 2.0 support We recommend that you use a pressure-sensitive tablet and pen for basic features Download: Autodesk SketchBook Pro 2021 Full Version [ FileUp ][ Uptobox ][ UsersDrive ] Jamu Only [ FileUp ][ Uptob

Testhead

4.3         Testhead The testhead is that portion of the tester that supports the PIN, ASRU and Controller cards.   The testhead is divided into two BANKS and each BANK is divided into two MODULES, see figure 2 below.  Bank 1 contains modules 0 and 1, bank 2 contains modules 2 and 3.  The test fixtures are placed on the banks of the tester and locked down for board testing.  The testhead cards interface to the test fixture through the spring loaded pogo pin “nails” at the top edge on each of these card types. 4.4       Support Bay The support bay is a stand-alone cabinet that houses the power supplies for the Unit Under Test.  This bay also houses the test station power distribution unit and test station controller on earlier models. 4.5       Emergency Shutdown Switch The emergency shutdown switch is the large red button located at the lower left corner on the front of the testhead.  It turns off all AC power to the testhead, and is equivalent to turning off the m

Kelebihan dan Kekurangan Saluran Listrik Jenis Saluran Udara dan Saluran Bawah Tanah

Berdasarkan pemasangannya,   saluran distribusi dibagi menjadi dua kategori, yaitu : saluran udara (overhead line) merupakan sistem penyaluran tenaga listrik melalui kawat penghantar yang ditompang pada tiang listrik. Sedangkan saluran bawah tanah (underground cable) merupakan sistem penyaluran tenaga listrik melalui kabel-kabel yang ditanamkan di dalam tanah. 1.    Saluran Bawah Tanah (Underground Lines) Saluran distribusi yang menyalurkan energi listrik melalui kabel yang ditanam didalam tanah. Kategori saluran distribusi seperti ini adalah yang favorite untuk pemasangan di dalam kota, karena berada didalam tanah, maka tidak mengganggu keindahan kota dan juga tidak mudah terjadi gangguan akibat kondisi cuaca atau kondisi alam. Namun juga memilik kekurangan, yaitu mahalnya biaya investasi dan sulitnya menentukan titik gangguan dan perbaikannya. Kedua cara penyaluran memiliki keuntungan dan kerugian masing-masing. Keuntungan yang dapat diperoleh dari suatu jaringan bawah tanah adalah